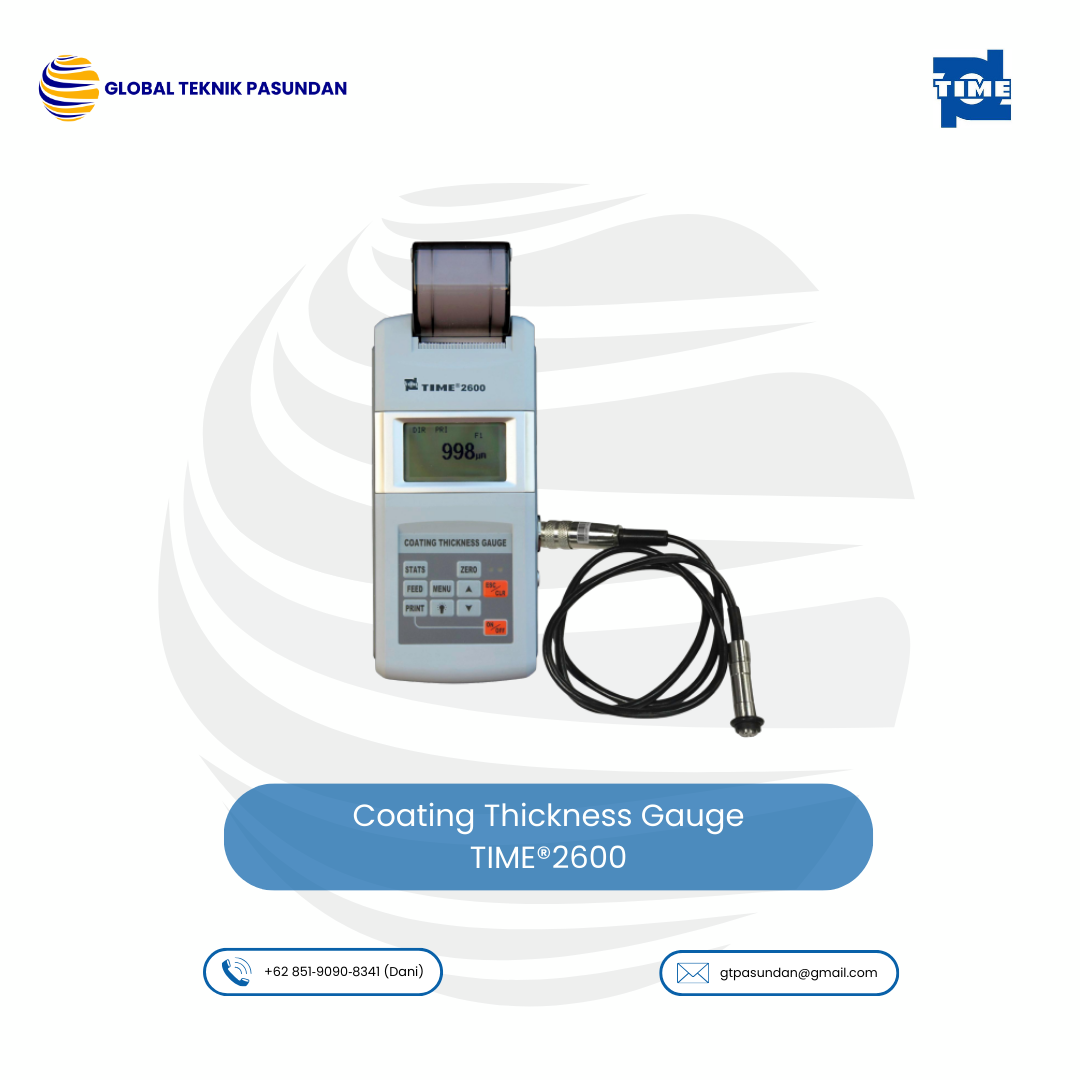
Coating Thickness Gauge TIME®2600
Jika anda berminat untuk membeli alat Coating Thickness Gauge TIME®2600 yang disediakan oleh Global Teknik Pasundan, silahkan anda langsung hubungi kami melalui :
PT Global Teknik Pasundan
- Alamat: Jl. Pd. Kelapa Raya No.3B, RT.10/RW.1, Pd. Klp., Kec. Duren Sawit, Kota Jakarta Timur, Daerah Khusus Ibukota Jakarta 13450
- Whatsapp / Email : Hubungi Kami
- Telepon atau WA : + 62 895-2811-6846 (Admin)
Description
Coating Thickness Gauge TIME®2600 metode pengukuran ketebalan: induksi magnetik (besi) dan arus eddy (non-besi). Alat ini dapat dengan cepat, tidak merusak, dan secara tepat mengukur ketebalan lapisan non-magnetik pada substrat logam magnetik, dan ketebalan lapisan non-konduktif pada substrat logam non-magnetik. Pengukur cat ini dapat dilengkapi dengan 6 probe opsional untuk aplikasi yang berbeda. Sangat cocok untuk pengujian lapangan dan penelitian laboratorium.
Features
- Two operation principles are adapted: magnetic induction (ferrous) and eddy current (non-ferrous) to take non-destructive measurements
- 6 types of probes are available for different applications
- Features two working modes: DIRECT and BATCH& two measuring ways: CONTINUE and SINGLE
- Statistics include the mean, maximum, minimum, test numbers and standard deviation.
- Memory of 640 data
- Two calibration methods for better correction
- Integrated with printer to print the statists values if needed
- Low battery indication and error alarm
- Backlight for the screen
- Auto or manual shutdown
- Conform to the standards of DIN, ISO, ASTMBS.
Spesifikasi
|
Probe types |
F |
N |
|
|
Measuring methods |
magnetic induction |
eddy current |
|
|
Measuring range |
0 ~1250 μm |
0 ~1250 μm, 0 to 40μm (for chrome plate on copper) |
|
|
Minimum resolution |
0.1μm |
||
|
Tolerance |
Zero point calibration |
±(3%H+1)μm |
± (3%H+1.5)μm |
|
H means the thickness of tested piece |
|||
|
Two points calibration |
±[(1~3)%H+1]μm |
±[(1~3)%H+1.5]μm |
|
|
H means the thickness of tested piece |
|||
|
Measuring condition |
Min. curvature radius (mm) |
Convexity 1.5 |
Convexity 3 |
|
Min. testing area diameter (mm) |
Ø7 |
Ø5 |
|
|
Critical thickness of substrate(mm) |
0.5 |
0.3 |
|
| Standards | DIN,ISO,ASTM,BS | ||
| Calibration | Zero and foil calibration | ||
| Interface | RS232 | ||
| Statistic | Number of measurement, mean, standarddeviation, maximum and minimum | ||
| Data memory | 640 readings | ||
| Limits | Adjustable with alarm | ||
| Power | NiMH rechargeable battery | ||
|
Operating environment |
Temperature: 0~40℃ | ||
| Humidity: 20%~90% | |||
| No strong magnetic field | |||
| Dimensions (mm) | 230×86×47 | ||
|
Probe model |
F400 |
F1 |
F1/90º |
F10 |
N1 |
CN02 |
|
|
Operating principle |
Magnetic induction |
Eddy current |
|||||
|
Measuring range (µm) |
0-400 |
0-1250 |
0-10000 |
0 to 1250 μm 0 to 40μm (for chrome plate on copper) |
10~200 |
||
|
Low range resolution (µm) |
0.1 |
0.1 |
10 |
0.1 |
1 |
||
|
Accuracy |
One-point calibration (µm) |
±(3%H+1) |
±(3%H+10) |
±(3%H+1.5) |
±(3%H+1) |
||
|
Two-point calibration (µm) |
±[(1~3)H%+0.7] |
±[(1~3)H%+1] |
±[(1~3)%H+10] |
±[(1~3)%H+1.5] |
- |
||
|
Measuring conditions |
Min curvature of the min area (mm) |
Convex 1 |
1.5 |
Flatten |
10 |
3 |
Flatten |
|
Diameter of the min area (mm) |
φ3 |
φ7 |
φ7 |
φ40 |
φ5 |
φ7 |
|
|
Critical thickness of substrate (mm) |
0.2 |
0.5 |
0.5 |
2 |
0.3 |
unlimited |
|
You must be logged in to post a review.


Reviews
There are no reviews yet.